
10 Straightforward Steps to Install Your Picket Railing
While many people consider themselves capable of installing a wooden railing, the thought of installing an aluminum picket railing is intimidating to them. They might imagine plasma torches and welding masks, but the installation of a Hansen Picket Railing System is much more straightforward than that. Here they are in 10 straightforward steps:
![]()
Step 1 – Component check: Determine that all components have arrived undamaged and that they match the packing slip.
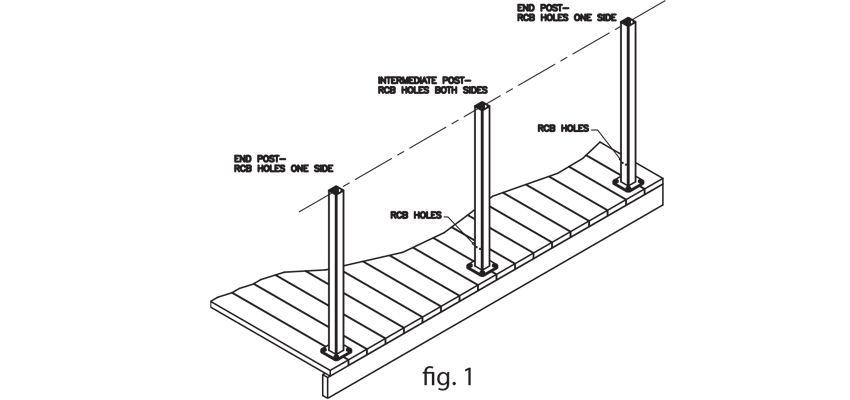
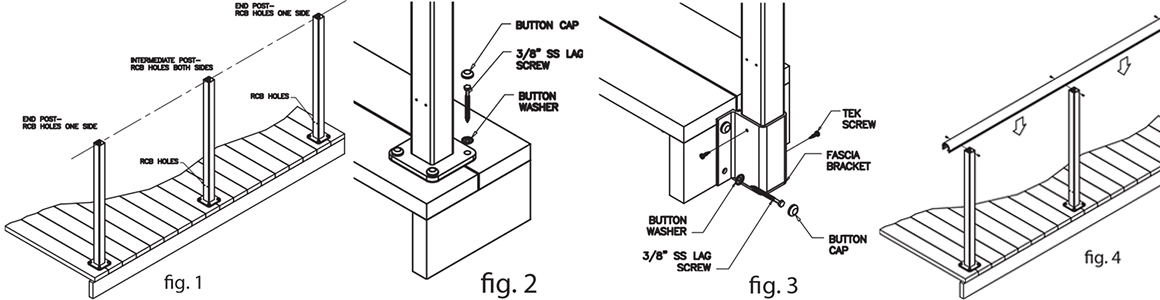
Step 2 – Install Posts ( fig.1): Position and mount all posts utilizing the neoprene pads under the base plate. The sides of the posts with RCB holes should be facing the next post in line. Be sure that the posts in line and plumb. Post spacing should not exceed 5 feet. When choosing your mounting lag screws, be sure to allow for 3” of thread penetration into deck structure. You may need to add some wood blocking at the post locations to accommodate this thread embedment requirement
Step 2a – Surface mounting ( fig.2): utilizing the neoprene gasket under the base plate, anchor each post using four 3/8”x 3-3/4” minimum lag bolts with button washers and color matched button caps.

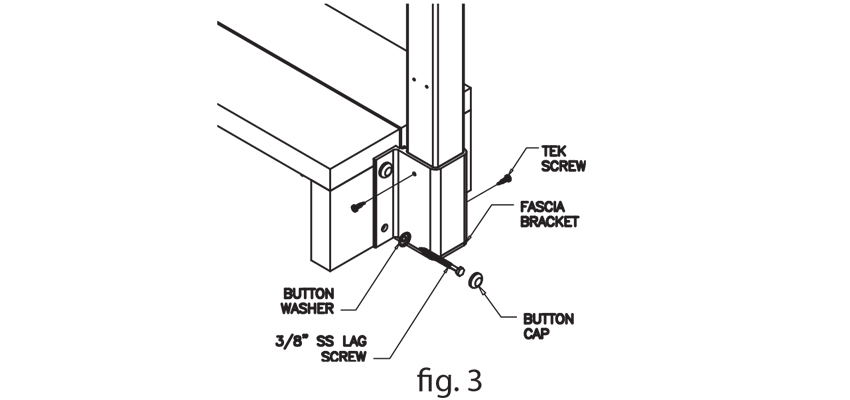
Step 2b – Fascia mounting ( fig.3): anchor each fascia bracket using four 3/8”x 3 3/4” minimum lag bolts with button washers and color matched button caps. Secure the posts into the brackets with stainless steel tek screws being sure that the top of the posts all line up.
Note: If installing in conjunction with a lightweight concrete or tile/ slate surface then a stanchion mount be appropriate. Contact us for these details.
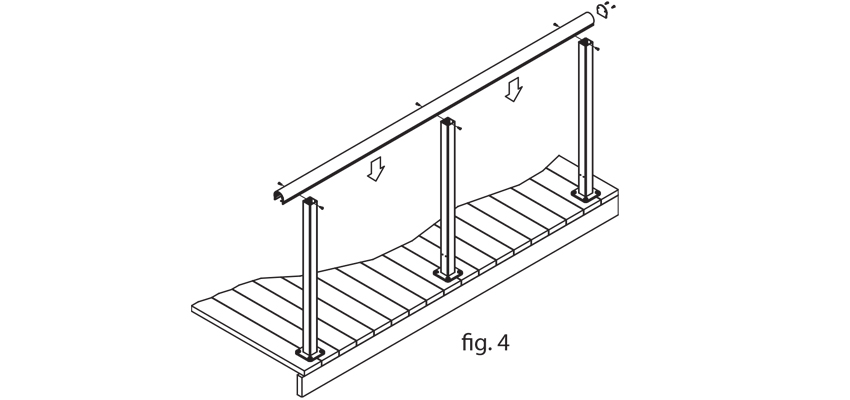
Step 3 – Cut & install Top Rails: Cut the top rail to length and press it into position on top of the posts making sure it is seated all the way down on top of all posts. Be sure to attach end plates (see step #5) to any open ends and any end that will mount to the structure.
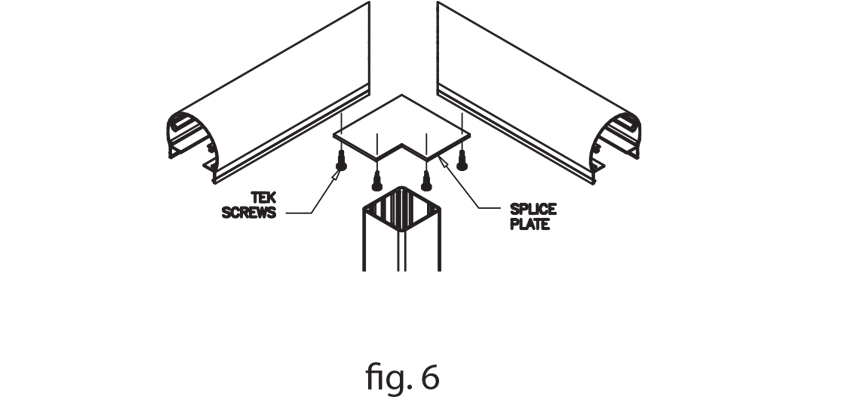
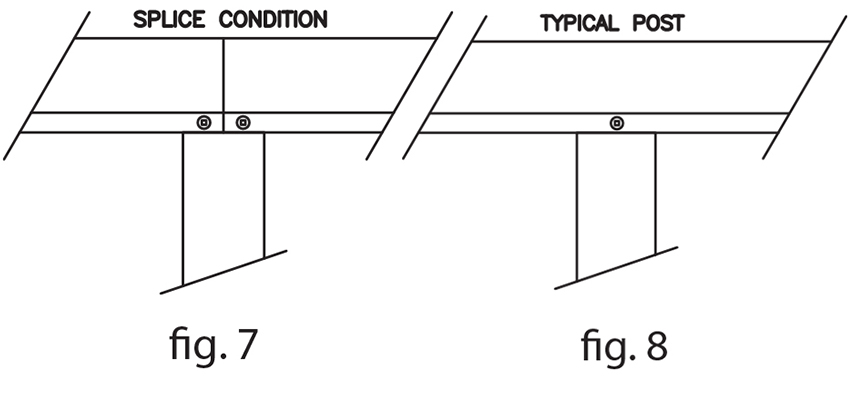
Step 3a – In-line Splices ( fig.6): Be sure to cut the top rail at 90 degrees and center the joint over a post. Secure the splice plate using four #10 x 3/4” TEK screws to ensure a strong splice
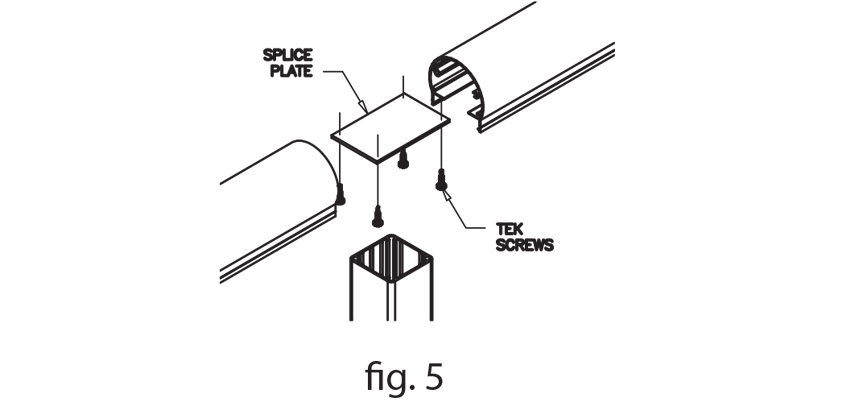
Step 3b – Mitered joints ( fig.5): cut each top rail miter at 1/2 the total corner angle (for a 90 degree corner you would cut the top rail at 45 degrees) . Add one splice plate to connect and strengthen the miter joint; each splice plate is secured with four #10 x 3/4”TEK The secure the top rail to the posts using more #10 stainless steel TEK screws.
Step 4 – Mount Top Rails: Fasten the top rail to each post using two #10 x 3/4” TEK screws (four screws for butt splices); screws should penetrate through the top rail ange and into the center of the post face. Screws should be attached to the front and back of each post.
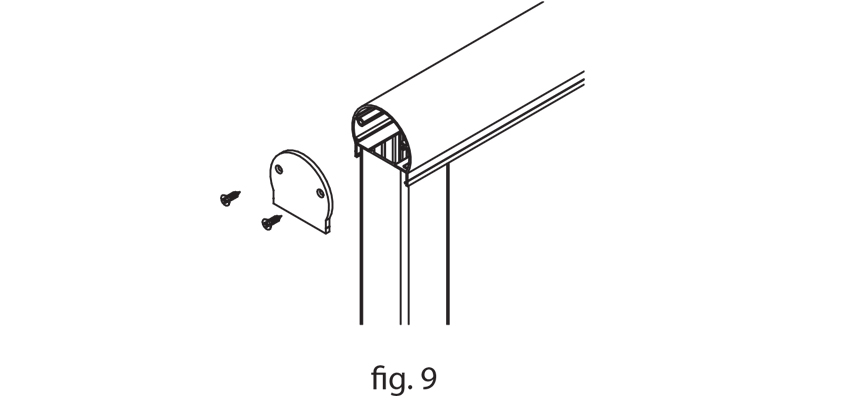
Step 5 – Attach End Plates ( fig.9): install the end plate to all of the exposed top rail ends using two #10 x 3/4” at head screws.
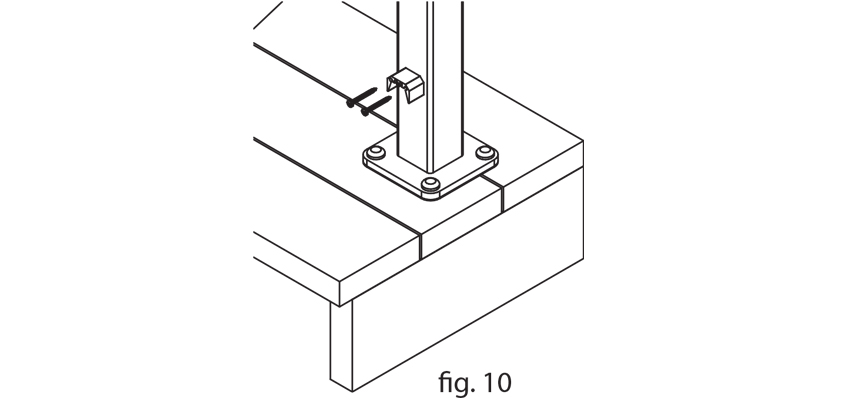
Step 6 – Mount RCBs ( fig.10): Identify the RCB (Rail connection block) pre drilled holes on the installed posts. Install the RCB with two #10 x 1-3/4” pan head Tek screws. The angles on the Rail Connection Block should be facing down.
Step 7 – Cut Bottom Rails ( fig.11): Measure between each set of posts just above the RCB’s. Cut the bottom rail for each section no more than 1/16” less then your corresponding measurement. Do not install the bottom rails to the the frame at this time.
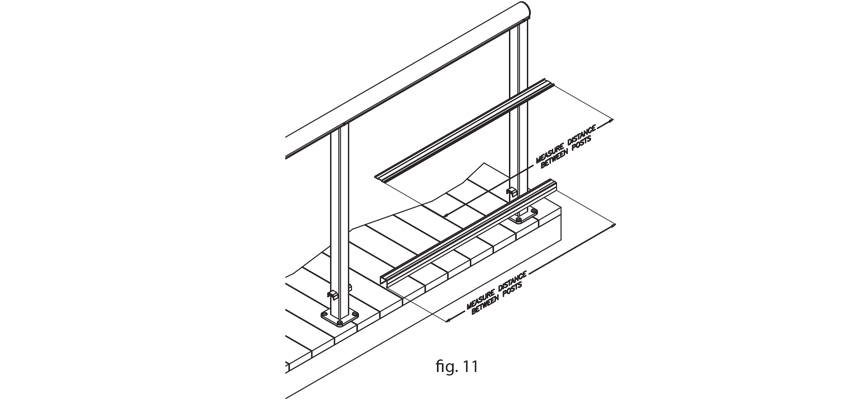
Step 8 – Cut Top Rail Infi lls ( fig.11): Measure between each set of posts just below the top rail. Cut the top rail infill for each section no more than 1/16” less then your corresponding measurement. Do not snap in the top rail infi lls to the top rail at this time.
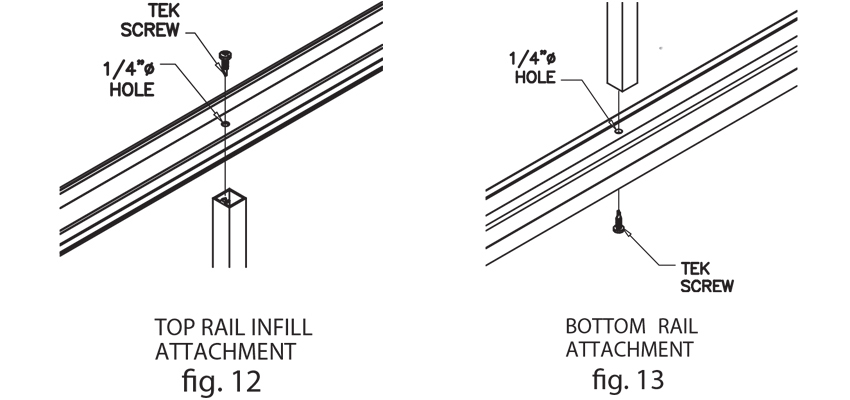
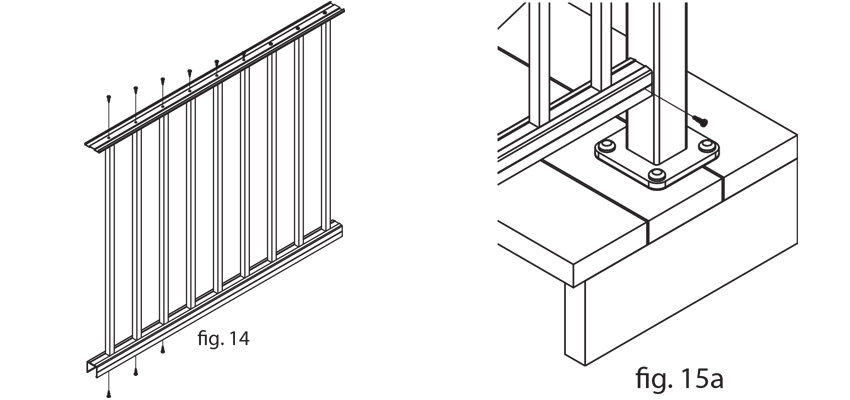
Step 9 – Assemble Picket Panels: Utilizing the #10 x 3/4” SS pan head Tek screws provided, assemble the picket panels by first screwing through the top rail infi ll into the picket. Then through the bottom rail into the picket. Repeat this process until the picket panel is fully assembled. There should be no gaps greater then 3 7/8”
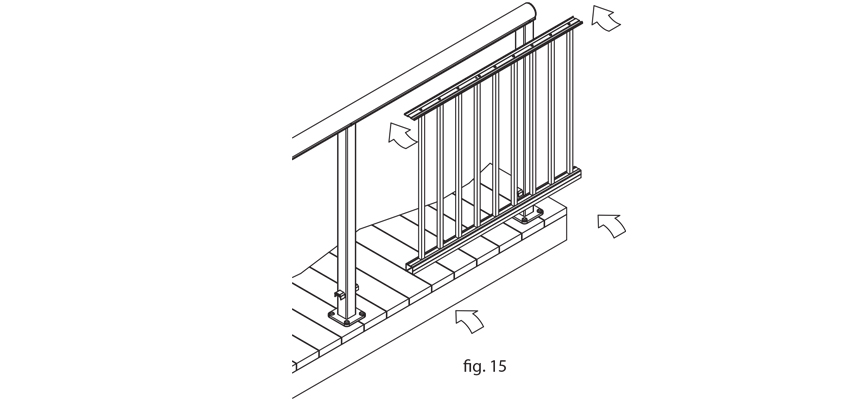
Step 10 – Install Picket Panel Assemblies: Taking the assembled picket panel, place the bottom rail onto the RCB’s and roll the top of the panel in line with the top rail. (There should be no more than 1/4” gap between the top of the panel and the bottom of the top rail) Lift and snap the panel into the top rail. The infi ll should be fl ush with the underside of the top rail. Once the picket panel is firmly in place, secure the bottom rail to the RCB using #10 x 3/4” SS Tek screws. These holes should be pre-drilled with 5/32” drill through the flange of the RCB for ease of screw insertion.
Continue installing picket panels until all railing sections are complete.
